How to get water (via App)
There two ways to get water during your booking slot:
You can use either or both methods for a booking.
1. Login
Go to sira.org.au and click Login
a. Enter your email address registered with SIRA
b. Click or tap 'NEXT'
c. Enter your 6-digit PIN (Click here if you don't have a PIN yet or if you forgot your PIN)

2. Start the current booking
If you have a current booking, it should be visible on your screen, like this:
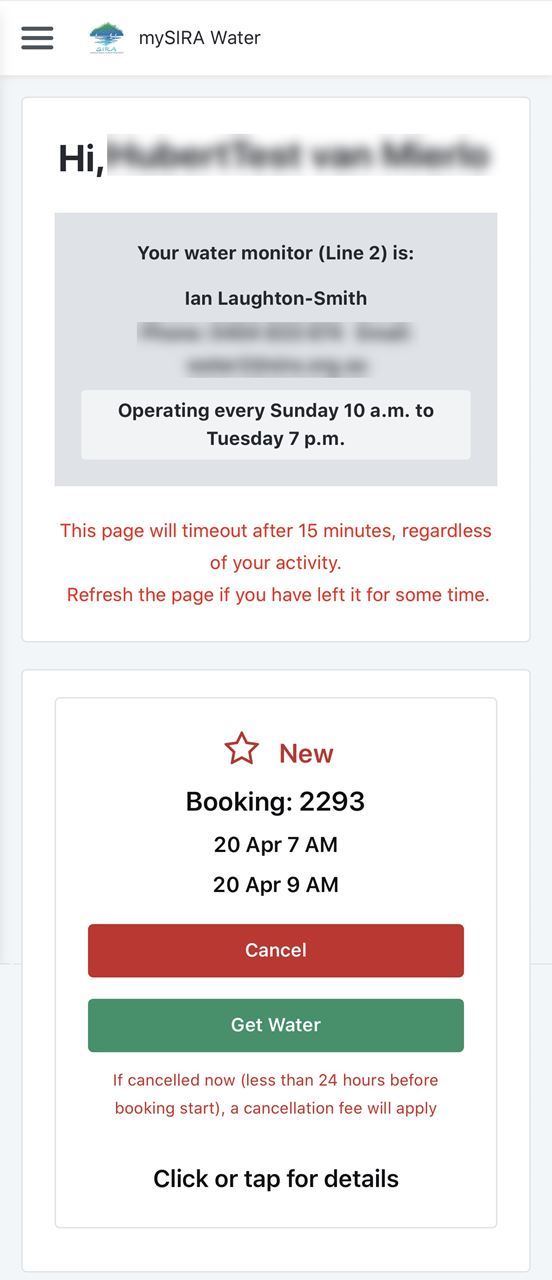
Click or tap the 'GET WATER' button.
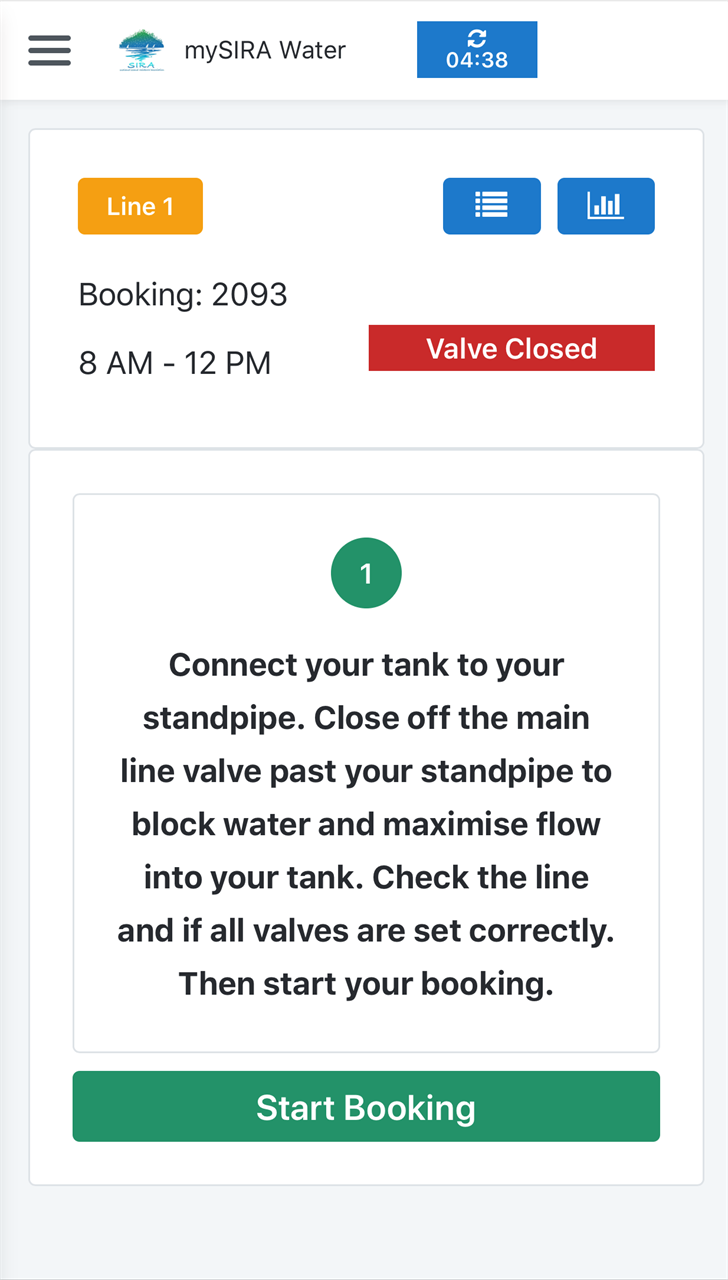
You should now see the following screen:
(Click here if you don't see this)
Click 'Start Booking'.
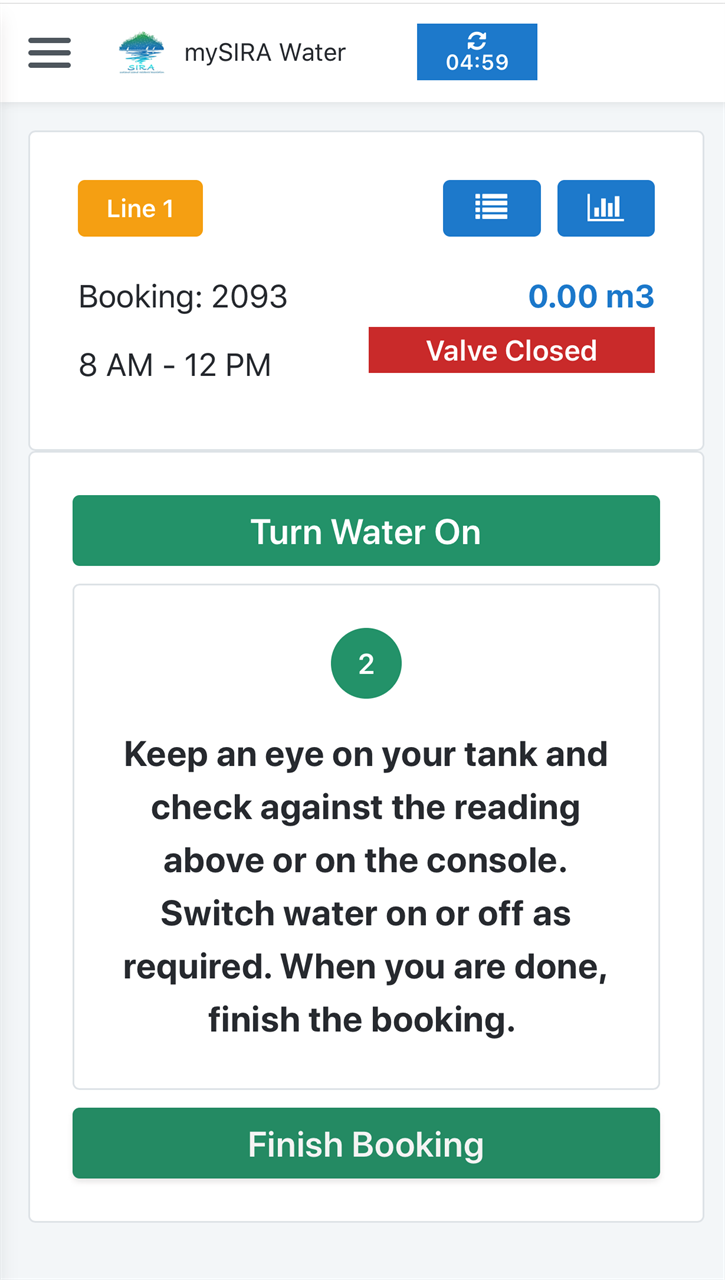
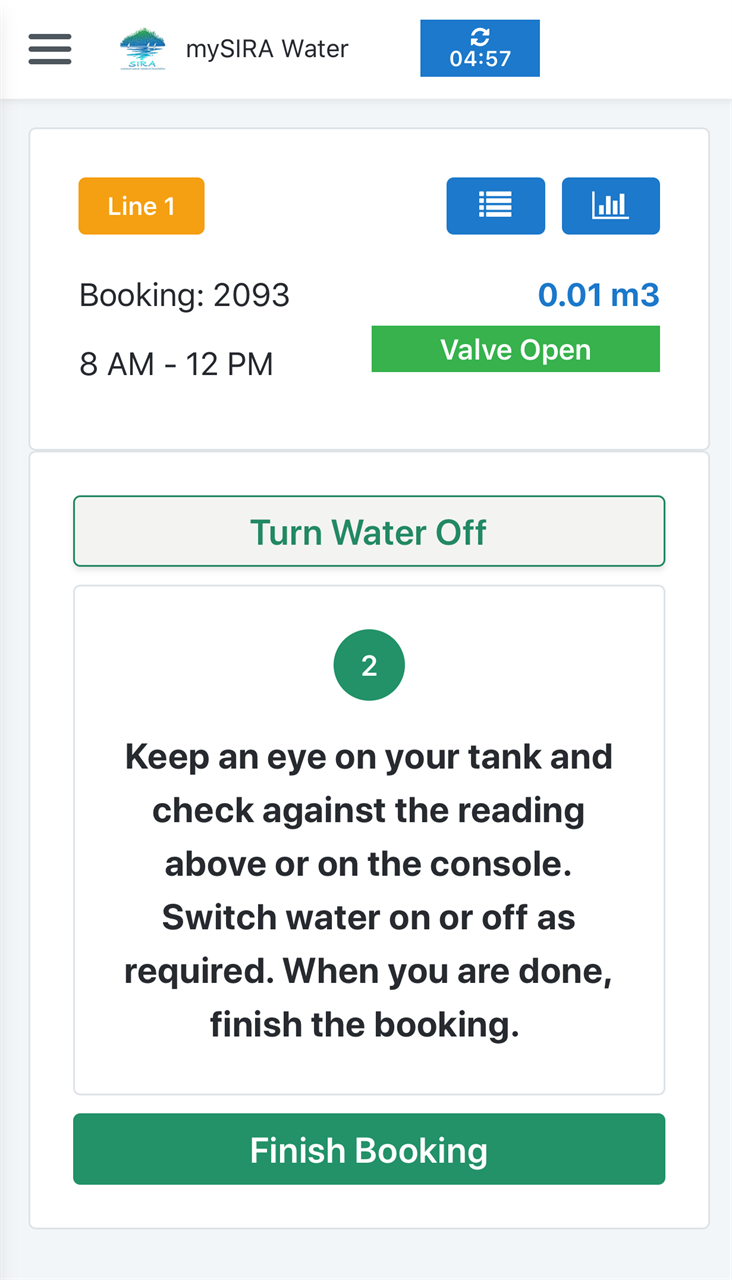
Once started, the header of the screen will look as follows:
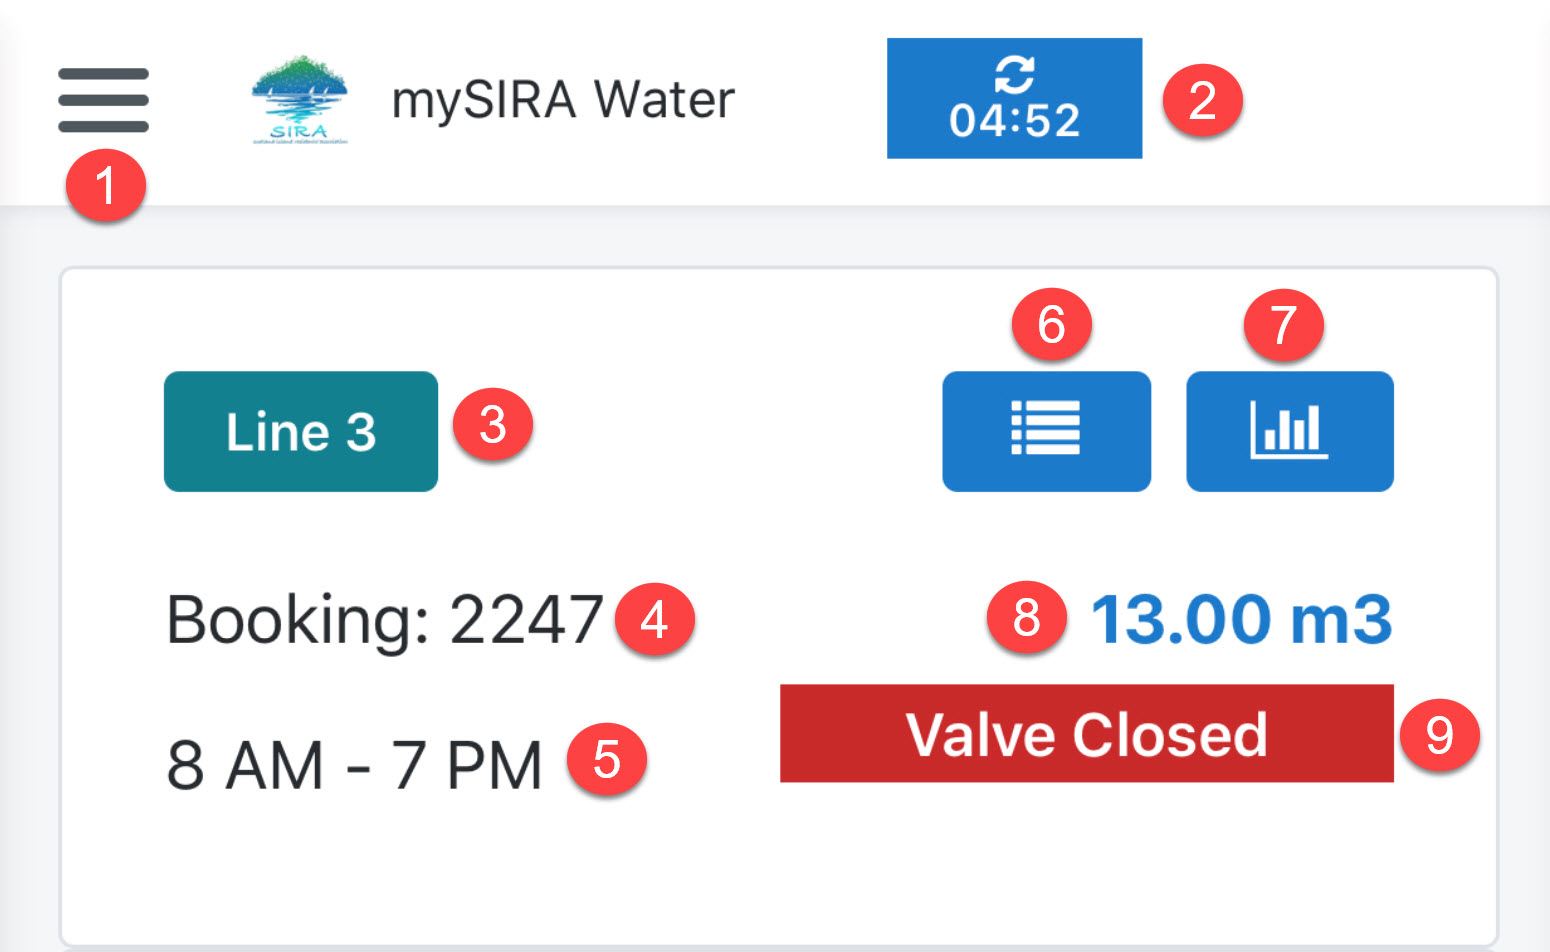
- Menu: access to your bookings, or to log out.
- Refresh counter. Click/tap to refresh the screen or wait for the counter to reach 00:00.
- The water line the booking is for.
- Your booking number.
- The start and end times of your booking.
- Click to see the booking log.
- Click to see the flow chart.
- The quantity of water measured since you started the booking.
- The status of the valve (of the water line the booking belongs to).
3. Turn Water On or Off
When step 2 is displayed on screen, you can turn water on by tapping/clicking 'Turn Water On'.
The valve will now open within a few seconds and this will indicated on the screen.
If the valve is open, you can turn water off, by clicking 'Turn Water Off'.
The valve will close within a few seconds and this will be indicated on the screen.
4. Monitor your booking
The details of your booking will update every 5 minutes. You can see the refresh counter at the top of the screen counting down.
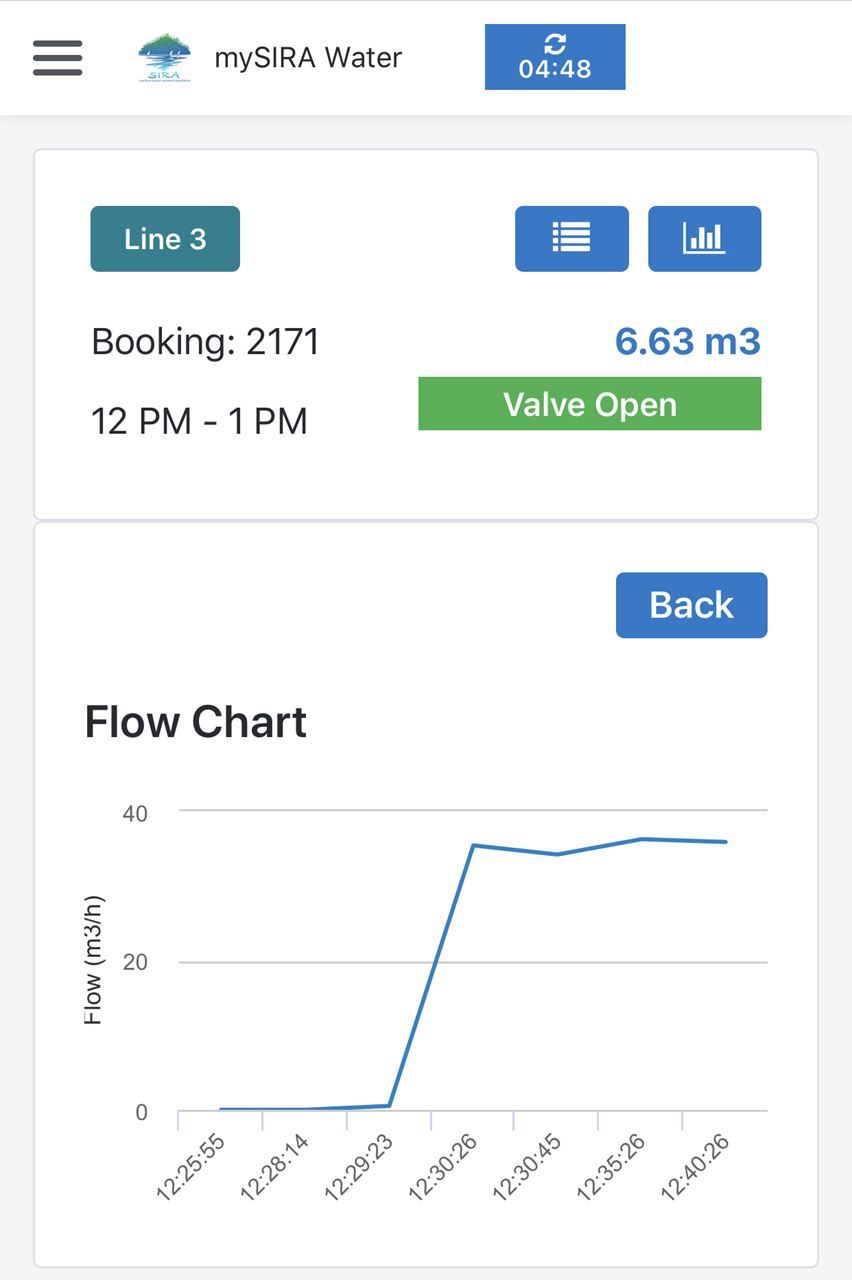
A. Flow Chart
Click the graph button to show a flow chart. The water flow in cubic meter per hour (m3/h)
The plot is in intervals of 5 minutes.
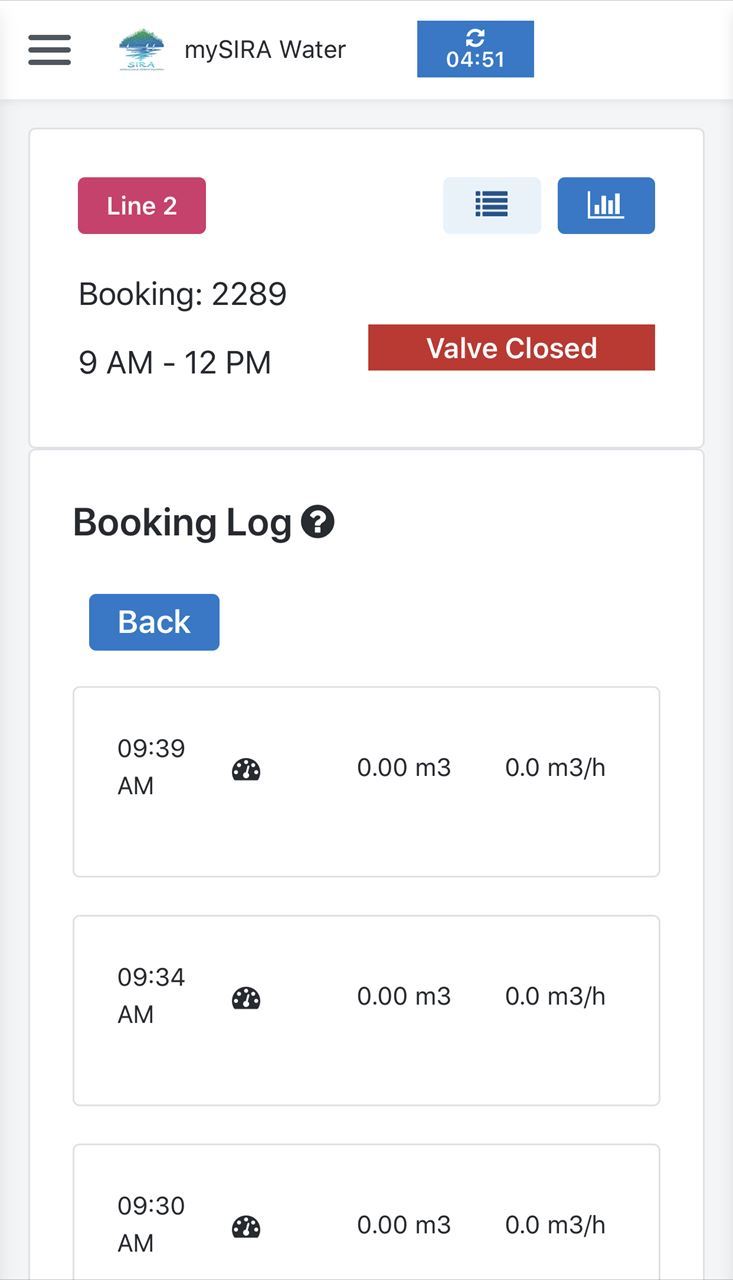
B. Booking Log
The booking log shows entries of events. See a list of event types below. The entry at the top is the last one added, so you need to scroll down to get to the bottom. The entries show:
- Time of the entry
- Event type icon
- Cubic metres of water for the booking (cumulative)
- The flow rate since the last log entry in m3/h (cubic meters per hour)
Note: 1 m3 water = 1000 liters of water. The water quantity gone through the meter is measured in increments of 10 litres. 10 litres = 0.01 m3.
Event types
| | This is always the first entry in your log. It indicates that the Console is ready to start the booking and water flow. |
| | The start event indicates either: 1. you have logged on to the Console, or 2. you clicked/tapped 'start booking' in the app. |
| | The water was turned on, in other words, the valve was opened. This will be automatically done when you start the booking from the app, or when you turn the water on from the app or when you turn the water on from the Console. |
| | The water was turned off, in other words, the valve was closed. This will happen when you turn the water off from the app or from the Console. |
| | The booking was finished. This is done by you on the Console, from the app, or automatically at the end of your booking slot. |
| | There is no invent, but a meter reading has been recorded and is displayed in the log and the chart. |
5. Finish your booking
When step 2 is displayed in the app, click 'Finish Booking'.
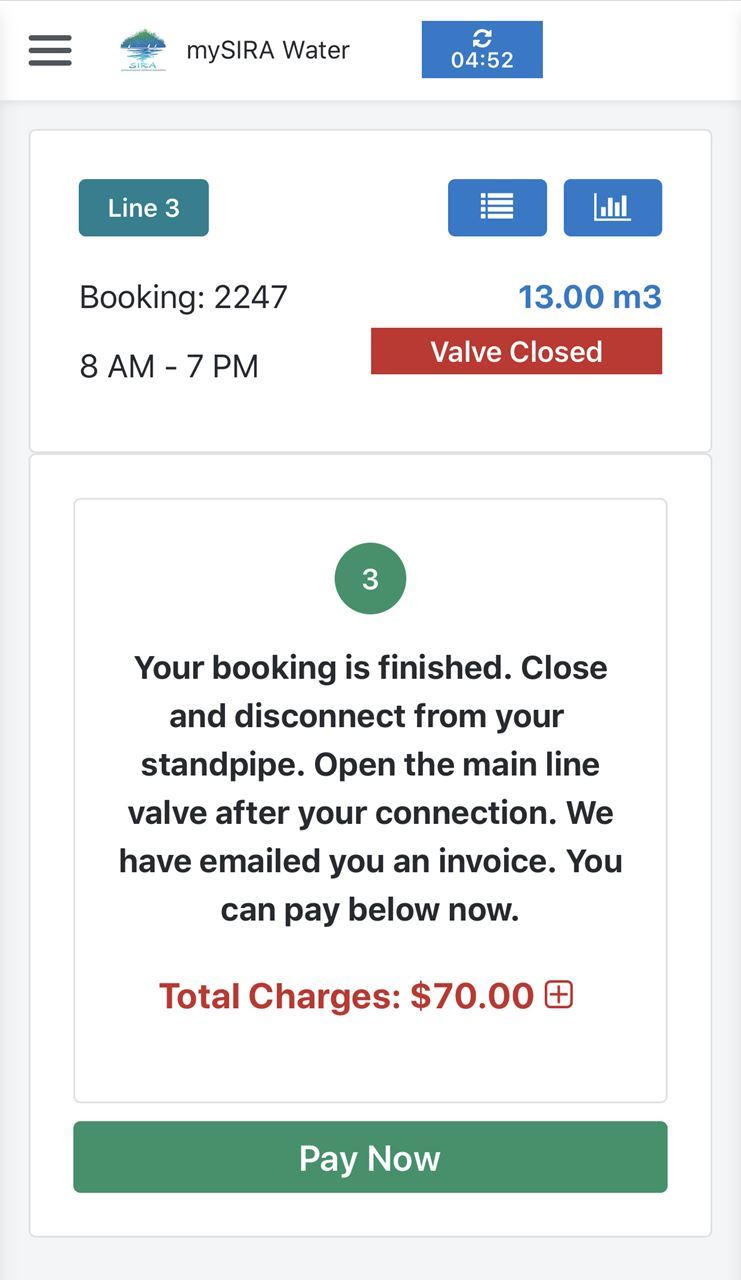
6. Pay your invoice
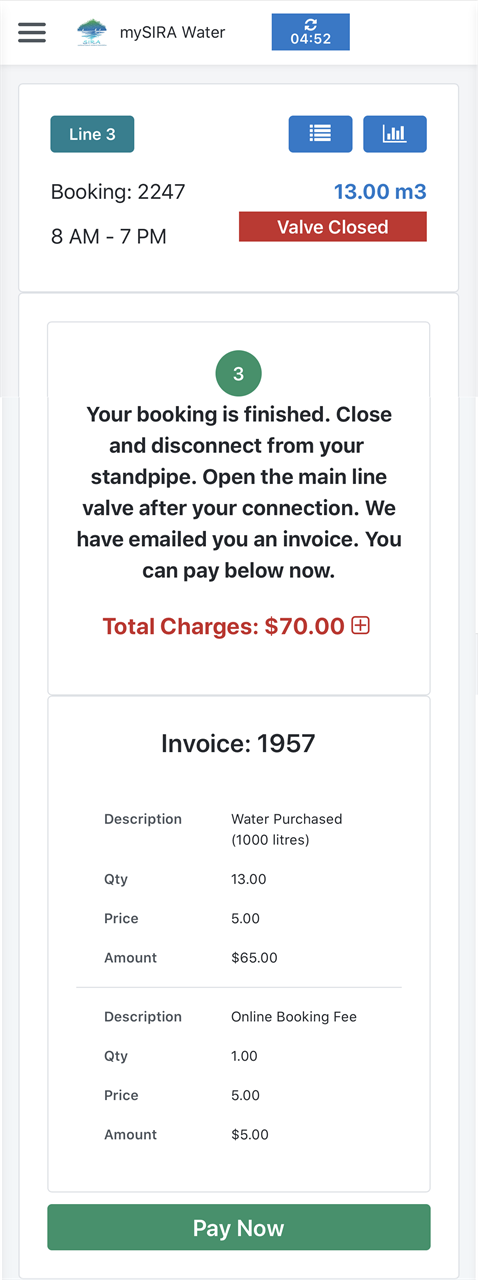
After you finished the booking, step 3 will be displayed. Step 3 includes the invoice total. You can pay the invoice by clicking 'Pay Now'.
If you have stored a credit card when paying one of your previous invoices, you will see a message similar to the one below:
- If you pre-authorised the payment, when you made the booking online, the check box will be selected.
- If you did not pre-authorise, you can select the check box, however you will have to enter your PIN if you haven't done so earlier.
With the check box selected, when you click 'Pay Now', the system will process your payment immediately.
If you do not select the check box (even if you pre-authorised the payment), you will be prompted to select or enter a payment method in the next screen. You may want to do this if your credit card has expired or when you want to use a different payment method.

If you want to see the invoice details before paying, click the + sign next to the total charges amount:
7.When you cannot get water via the app
You may see one of the following screens:
A. The system is not yet ready to deliver your water
This occurs most likely before you booking starts. You need to wait until the booking start time has passed before you can start.
Click the refresh timer at the top if you would like to check.

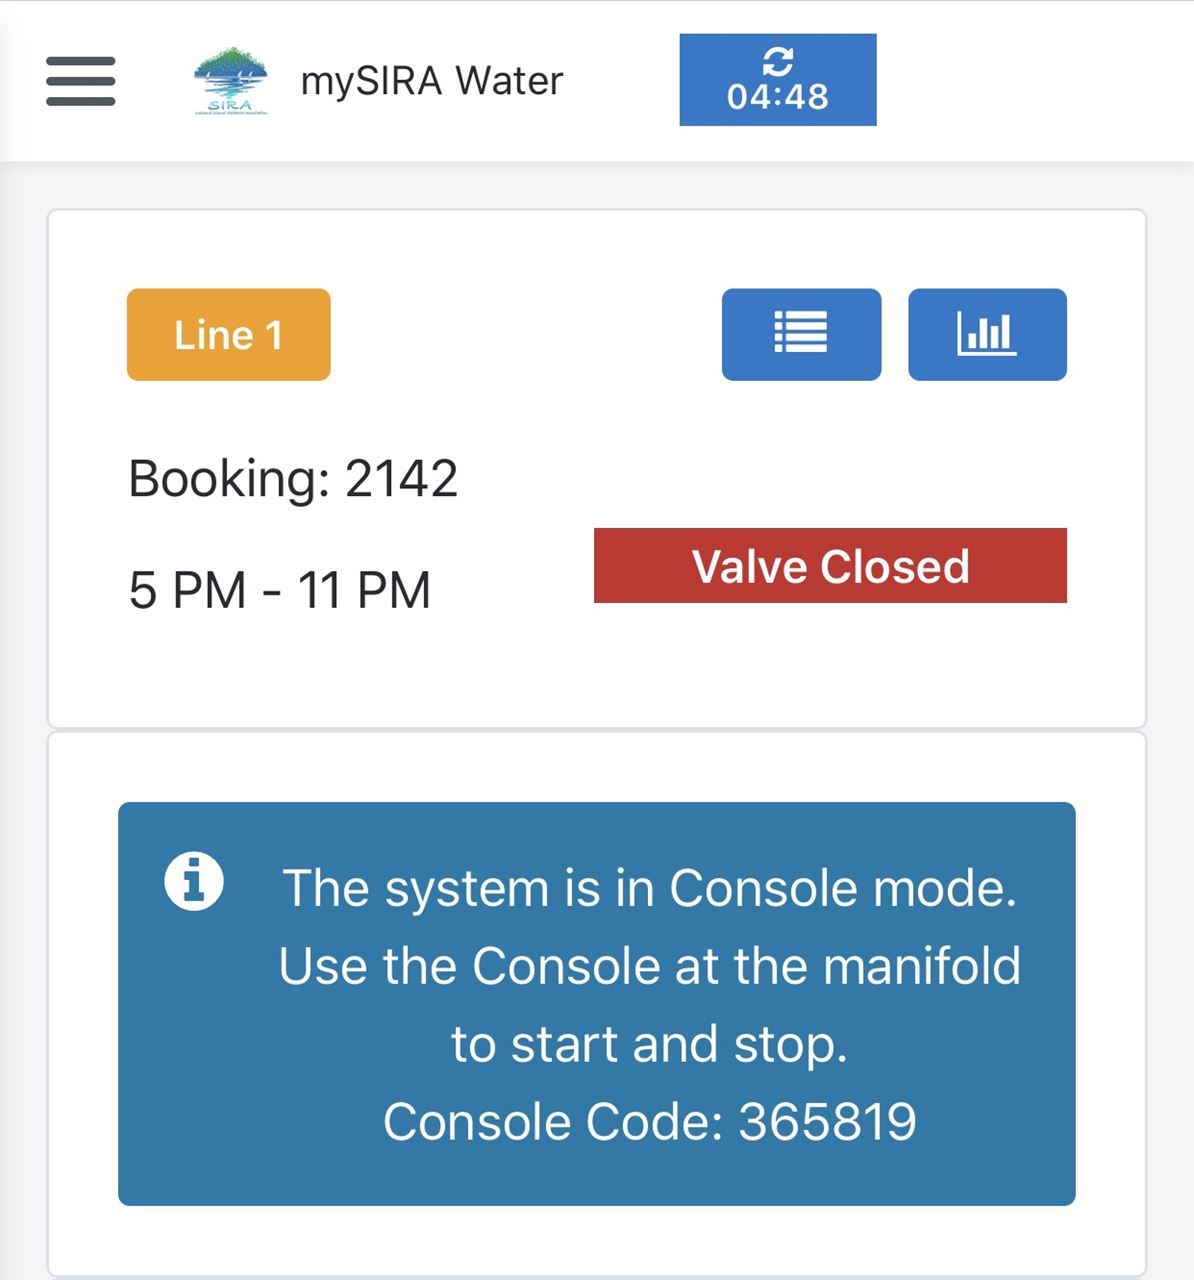
B. The system is in console mode
At times it may happen that the system is in 'Console Mode' and cannot be operated via the app.
You can still access your water via the Console. Read the Console Guide for more info.
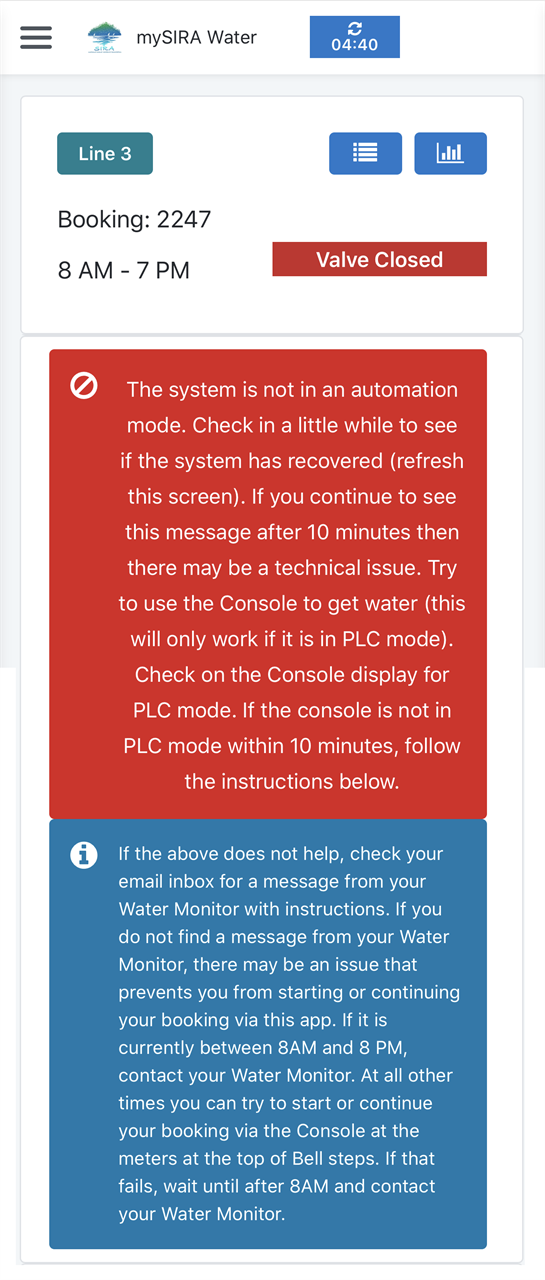
C. The system is not in Automation mode
This can occur when the communication services are down, the console is out of order or another fault prevents the system to work as normal.
Important!
The system may still be operable via the Console and if you have no other information to suggest the system is out of order completely, you should try to use the system via the Console.
